Sunflower & pumpkin seed butter

I am a peanut butter loving woman living in a nut free house due to my son’s food allergies. There are a couple of nut free alternatives on the market but my preferred one made from sunflower seeds is only available in the USA and while you can order it to be shipped to the uk it is eye wateringly expensive to do so. Finding seeds that have not been processed in the same facility as peanuts and treenuts has been a life changing discovery. Life changing. I am not in anyway linked to or paid by https://nutrenergy.com/ but I’m so happy to have found a safe source of seeds (and great customer service) that I have to resist telling them I love them several times a week on social media. They’ve not blocked me yet so I think I’ve managed to be fairly restrained in my affection for them.

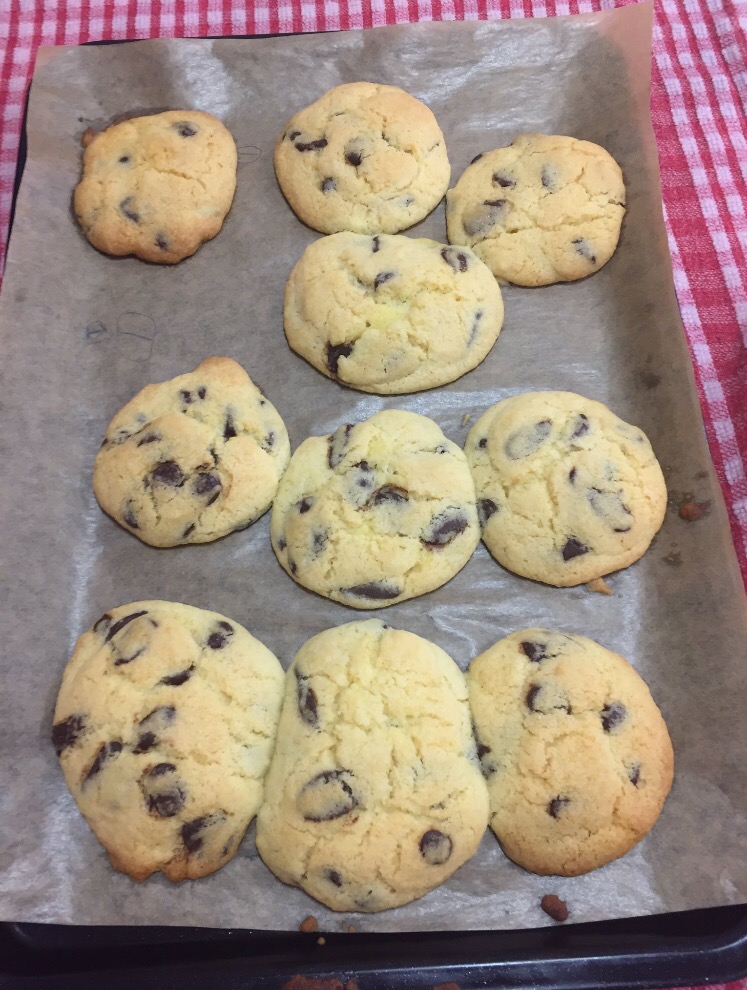
After a lot of experimentation with different seeds, oils and sweeteners (you can make it without added sweetness if you prefer) I’ve settled on a recipe that my daughter and I absolutely love and will pretty much eat on anything – biscuits, scones, muffins, toast, cereal. My son is less taken with the idea of eating something that looks a bit (ok quite a lot) like baby poo but he really enjoys biscuits & bars using seed butter as an ingredient.

You’ll need a food processor to make the seed butter.

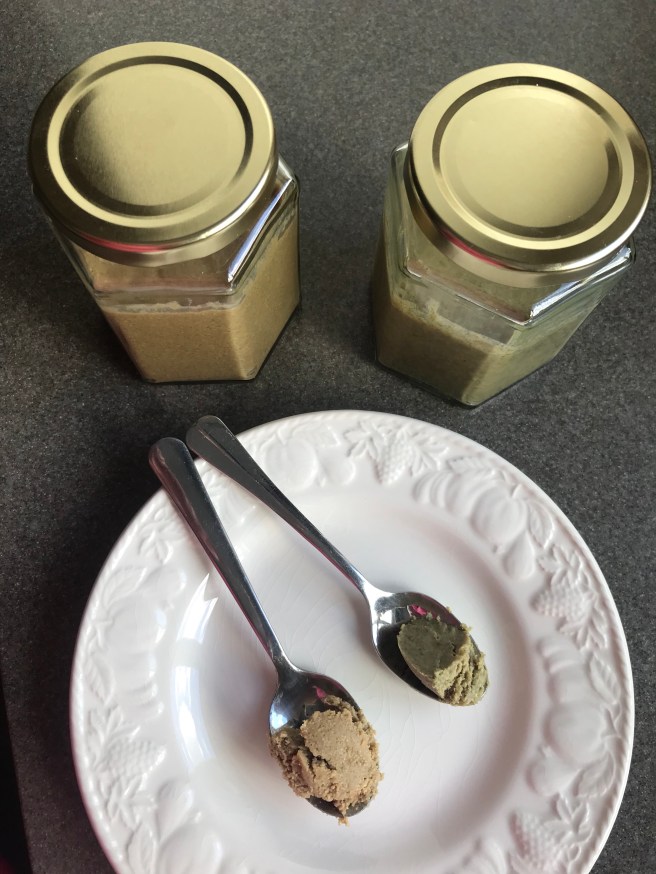
This butter is a combination of sunflower and pumpkin seeds. Just sunflower seeds is delicious and needs less oil, just pumpkin seeds is a lot thicker and curiously green. The addition of chia seeds looks like you’ve stirred in fleas. Don’t do it.

Ingredients

90g (3/4 cup) toasted Sunflower seeds

40g (1/4 cup) toasted Pumpkin seeds

1/4 teaspoon salt

1 tablespoon maple syrup

3 tablespoons sunflower oil (melted coconut oil is also delicious, it’s sets a lot firmer in the fridge so depends what consistency you prefer)

Instructions

To toast the seeds (which gives them their nutty flavour) spread a thin layer of seeds on a baking tray lined with baking parchment and toast in the oven for 18 minutes at 165C. Extra seeds not required for the recipe can be stored in an airtight container and are super tasty sprinkled on breakfast and on salads (or eaten by the handful).

Measure the sunflower & pumpkin seeds and the salt and place them into a food processor

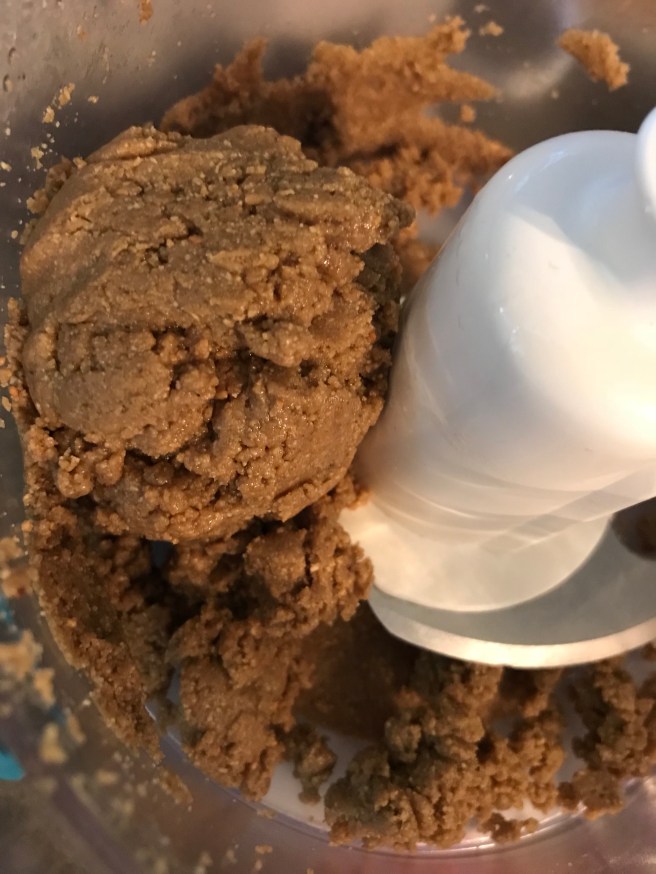
Process on high for 2 minutes, scrape the sides with a spatula then leave the seeds to sit for 15 minutes to release their oils.

Whizz the seeds again repeating several times for about a minute at a time with a minute in between until they start to clump together.

Add the maple syrup and a tablespoon of sunflower oil and whizz again then add the remainder of the oil a spoon at a time till you have the desired consistency. If you are just using sunflower seeds you will only need a couple of tablespoons of oil, just pumpkin is considerably thicker and may need more.

You can store the seed butter in clean sterilised jars (google how to sterilise jars, it’s really simple) but we get through it so quickly I usually use a small plastic tub stored in the fridge. I can’t say how long it’ll keep in the fridge because we scoff it within 3 days.

These were seed butters I made with coconut oil so are a more set consistency (optimum for eating by the spoonful šŸ˜‰)

I’ve been making seed butter at least once a week. It’s tasty, it makes me happy because it tastes so nutty but without the fear and I’m delighted my daughter likes it as it’s certainly a more nutritious topping than jam.

Self catering with allergies in Lanzarote

Just back from a week of winter sun in Lanzarote. December is a lovely time to visit as it’s warm and sunny but not dreadfully so. This was our second visit, last year the weather was very pleasant but windy and you needed a sweatshirt, this year it was glorious! Of course I’d packed for pleasant so I ended up rocking my husband’s swim shorts by the pool #stylish.

We flew with Jet2 which is my airline of choice for flying with a nut allergy. Lots of airlines have reasonable allergy policies but Jet2 have been consistently good. If you inform them prior to your flight that you have a severe nut allergy they don’t load nuts onto the plane which means they can’t make an announcement regarding not serving nuts then forget and still serve them (I’m looking at you EasyJet). It’s over 4 hours flight from Edinburgh to Lanzarote so I packed breakfast (muffins) to eat after check in (9.15am flight), lunch (filled rolls, crisps & fruit) to eat on the plane and plenty snacks as my kids eat about nine times what you would think they might need when travelling. I didn’t look into buying food on board as my son has multiple allergies and I think crisps are about all he can have from the in flight menu. I take lollipops for the kids for take off and landing.

We stayed in Puerto del Carmen which is only a short transfer from Arrecife airport. You could get a taxi to your accommodation but we hired a car so we could do a proper supermarket shop rather rely on the smaller resort supermarkets. You could probably manage shopping in town but it’s pricier and there is less choice.

There is a large Mercadona and a Hiperdino supermarket in Playa Honda near the airport. Ā I like Mercadona, I’ve shopped there in the Costa del sol as well and they’ve lovely fresh produce and a reasonable selection of dairy free milk. They also sell the nicest gluten free pasta I’ve eaten, I was convinced I’d bought wheat pasta by mistake it was so good.

They don’t have a free from section as such, just bits and pieces in with the regular products.

I bought gorgeous dairy free choc ices there last year but my son wasn’t that taken with them.

They have a selection of dairy free fruit yoghurts but they are all soya based so if you are milk and soya free your choices would be very limited (almost non existent). They also sell chocolate desserts and rather excitingly had chocolate mousse this visit (I’m easy excited by free from food).

A lot of the dairy free milks in Mercadona do not contain added calcium so check the label!

The Hiperdino has a fabulous free from section! I could have done all my shopping there apart from soya chocolate desserts as they only had a very small selection of soya fruit yoghurts. To my delight they had Gullon sharkie biscuits which my son loves and are free from gluten, milk, egg and nuts! (Contain soya lecithin). I stocked up on boxes to take home!

The free from aisle is just as you walk in the store.

They also have a large frozen section

There are a few options for dairy free spread.

I haven’t seen any dairy free cheese, I took some in a cool bag in my suitcase along with egg free mayo, chorizo sausage and pepperoni as the only cold meat I’ve been able to find that doesn’t contain milk is plain ham. I also packed some safe bread & rolls to freeze on arrival (handy to keep a packet for making a packed lunch for the journey home!), home baked biscuits and safe chocolate.

We did a big shop day one in the Hiperdino then I sent my husband back to the Mercadona day two for chocolate desserts. Our hire car was not very big so we dropped our suitcases at our villa and had a snack before going to the supermarket. There was a small spar near our villa which was handy for buying water and fresh bread for the wheat eaters among us.

We didn’t eat out. My son is allergic to milk, eggs, wheat, peanuts, treenuts, peas and lentils and it’s less stressful if we just feed ourselves. My husband cooked to give me a break. We keep it simple, baked potatoes, pasta, grilled meat. I packed some spice packets to liven meals up a bit. I took my own chopping board, grater, a frying pan and two cooking utensils. I also took lots of plastic clips for closing packets, you cannot take too many.

Restaurants are required to provide you with allergen information if you request it and this was clearly stated on menus outside them.

The Highlander too near where we were staying offered a full gluten free cooked breakfast (I discovered at the end of our holiday šŸ¤¦šŸ»ā€ā™€ļø).

http://www.highlandertoo.co.uk/

Allergy action is a super resource for translations if you do wish to eat out.

https://allergyaction.org/wp-content/uploads/2017/06/Translation-Spanish-a.pdf

We used their Portuguese translations to eat out one night last summer in Albufeira. I wrote out my son’s allergies and a list of questions and handed it to the waiter and my son had a super steak, chips & sliced cucumber which he really enjoyed. I however was so uptight I didn’t enjoy my meal at all and then cried and hugged the waiter when it all went well so my family aren’t best keen to eat out with me in public again.

We stayed in a villa with our own pool, I prefer a villa as you get a kitchen and full size fridge freezer as well as a dishwasher and a washing machine. I booked through Villa plus, we’ve used them several times.

Travelling home can be a challenge to cater for with a later flight. I don’t fancy an evening flight! We had to be out of the villa at 10am and the flight home was at 2.45pm. I made a double packed lunch and used a cool bag and ice packs which kept our food cool enough. No one complained about rolls & crisps for lunch at the airport then rolls & crisps for tea on the plane! I had plenty biscuits & sweets to keep us going as well.

I’d definitely go back, just perhaps not at New Year, they like a firework at New Year in Lanzarote which is probably fabulous if you are out celebrating but feels a bit like Armageddon in the back garden if you fell asleep at 9.30pm after a day of sunshine and a couple of glasses of fizz.

Chocolate beetroot brownies

I’ve been playing with this recipe for a while and I think I’ve cracked it. My kids love these brownies and are oblivious to the beetroot despite the colour!

Ingredients

3 small cooked beetroot (I buy these in the vegetable department in Tesco or Morrisons)

150g plain dairy free yoghurt (I’ve used Alpro soya and Koko successfully)

200g soft brown sugar (yes it looks a lot but they are brownies and hey they’ve got beetroot in them)

2 tablespoons maple syrup

1/4 cup cocoa (20g)

1/2 teaspoon salt

1 teaspoon baking powder

1/2 teaspoon xanthan gum

150g plain gluten free flour (I used Doves Farm)

Up to 1 cup dairy free chocolate chips or a full 85g Kinnerton free from chocolate bar broken into chunks

Instructions

Preheat oven to 180C and grease and line a baking tin (I used a 20cm square tin)

Chop & blend the beetroot till smooth

Mix the sugar, yoghurt, beetroot and maple syrup together in a large bowl

Sift the flour, cocoa, baking powder, xanthan gum and salt together and whisk to combine

Stir the dry ingredients into the wet ingredients until combined then stir in the chocolate

Pour mix into the prepared baking tin and smooth to the edges

Bake for 35 minutes

Cool on a rack before slicing (or eat warm and burn your tongue a little, maybe, I might have, it was worth it)

Also lovely cut with a large heart shaped cookie cutter

These stay moist and delicious for a few days if they haven’t already been eaten

Simple freefrom cookies to make with groups of childrenĀ 

This is a recipe I wrote to bake with a group of thirty Primary six (age 9) school children in a very basic kitchen classroom after I had been invited by my son’s teachers to share a cookie recipe that was safe for all the children in the class. My son has multiple severe food allergies and to get to bake safe cookies with his class mates was a hugely enjoyable and inclusive experience. For me it was the joy and lack of stress of him baking in a room where allergens were not present. The children were aware the recipe was safe for my son but we did not focus on it being a free from cookie and they were really just excited to be baking cookies! The children were divided into groups of five and the recipe made them two cookies each.

The following shopping list was enough to make 60 cookies with a little spare.

Baking parchment

1kg bag Doves Farm gluten free self raising flour (contains raising agents and xanthan gum

500g tub Vitalite dairy free margarine

1kg bag caster sugar

Carton rice milk

Bottle/tin golden syrup

Dairy free chocolate chips – I brought in a catering bag of Plamil dairy free chocolate drops from home (dairy, gluten, nut free but may contain traces of soya) Moo free also sell dairy free chocolate drops (may contain traces of nuts). If you cannot find chocolate chips safe for your needs buy bars of safe chocolate and get the kids to break it into pieces to make chunky chocolate chips.

Equipment neededĀ 

Each group should have-

A large mixing bowl

A large spoon for mixing (dessert spoon fine)

Tablespoon measure (ideally. Some of the kids actually used a regular spoon and it worked out ok)

2 Teaspoons

A baking tray

Baking parchment

* I brought in a safe set of baking equipment from home for my son and his group to use*

Recipe

Makes 10 cookies

3/4 cup gluten free self raising flour (make sure it contains xanthan gum)

1/4 cup caster sugar

1/4 cup dairy free margarine

1 tablespoon golden syrup

1 tablespoon rice milk

2 heaped tablespoons of dairy free chocolate chips

MethodĀ 

Preheat oven to 190 C (we had access to 2 ovens and were able to bake the cookies in two batches)

Line the baking trays with parchment

Measure out the caster sugar and margarine and mix well together (all the children took turns measuring and mixing. Some groups mixing skills were better than others but all the cookies turned out well)

Add the golden syrup and rice milk and stir well

Add the gluten free flour and mix till combined

Stir in the chocolate chips/chunks

Using one teaspoon to scoop and one to push the mix onto the baking tray measure out 10 cookies. Ā Each child placed two spoons of mix onto their group’s tray. Try to leave space between each scoop as the cookies spread in the oven.


The children wrote their group number in pencil on the baking parchment so they could keep track of their tray

An adult should then place the trays in a preheated oven for 10 minutes. Cookies on a lower shelf may need a couple of minutes longer.


The whole class were very enthusiastic about baking cookies and worked really well together. Despite fairly haphazard measuring and mixing everyone ended up with a lovely tray of soft style chocolate chip cookies. The cookies are best left till completely cool before handling.


The children wrote out the recipe as part of their extended writing which had a Christmas theme including baking cookies for Santa.

A huge thank you goes out to my son’s teachers for organising such an inclusive and fun baking session.

Chocolate orange cakeĀ 


My daughter turned 10 recently so I needed a fabulous cake and I needed it to be free from wheat, egg, milk and nuts so her brother could have a slice. I made a double layer cake with two kinds of icing and orange chocolate shapes to decorate. It turned out gorgeous! Safe for my boy but still super yummy. The cake was adapted from this recipeĀ http://www.telegraph.co.uk/foodanddrink/recipes/11223633/The-New-Baker-Vegan-and-gluten-free-chocolate-pumpkin-cake.html

Chocolate cake ingredients

240mls dairy free milk at room temperature (I used Koko)

2 teaspoons cider vinegar

120mls coconut oil melted

200g granulated sugar

125g Cocoa (I used Tesco’s own)

225g pumpkin purĆ©e (I used Libby’s tinned pumpkin, apple sauce also works)

1 tablespoon vanilla essence

2 teaspoons instant coffee dissolved in 2 tablespoons of boiling water

290g rice flour

60g potato starch

20g corn flour (tapioca also works)

1 teaspoon xanthan gum

2 teaspoons bicarbonate of soda

1/2 teaspoon baking powder

Instructions

I baked the cake the night before so it would be cool for me to decorate on her birthday.

Heat oven to 180c/350f and grease two round cake tins

Combine the dairy free milk and the cider vinegar and allow to sit for 5 minutes

Place the pumpkin purƩe, sugar, coconut oil, vanilla and coffee in a large bowl and beat until smooth

Stir in the milk/vinegar mix

Sift remaining dry ingredients together and whisk to combine

Add to wet ingredients and mix until well combined. It will be quite thick

Divide the mix between the two tins, smooth and then bake for 30-35 minutes (I baked for 35 and my cakes were a teeny bit scorched)

Allow to cool completely in the tins

‘Butter’ icing

220g icing sugar

1/4 cup cocoa powder

6 tablespoons dairy free spread (I used Vitalite)

1/8 teaspoon salt

1 tsp orange essence

Beat ingredients together until fluffy then pipe onto one cooled cake reserving some for attaching chocolates. I sliced off a thin layer of the cakes to even them out before icing.


Chocolate ganache icing

Half cup icing sugar (approx 75g)

1/2 tablespoon golden syrup

40ml tinned coconut milk (could use df cream)

90g dairy free chocolate (I used Plamil choc chips)

1 teaspoon orange essence

Place chocolate, coconut milk and syrup in a pot and heat gently stirring until melted, remove from the heat and stir in the orange essence and icing sugar

Place the second cake onto the iced cake then pour over the chocolate ganache.

I made chocolate woodland animals and trees by melting dairy free chocolate and stirring in orange essence then poring it into moulds and setting them in the freezer. I attached them to the sides of the cake using a splodge of the ‘butter’ icing. I used Tesco dairy free white chocolate buttons (contain soya) to write 10 on the top of the cake. The cake made 12 generous Ā slices. It was lovely on its own and it was lovely with dairy free Ice cream (and I believe it was lovely with custard). We ate it over 3 days and stored it in a plastic container on the kitchen counter.

Ice cream cones

I bake a lot with varying degrees of success but every so often I make something and it is spectacular. A bit like when I made egg free meringues and they looked and tasted like actual meringues, something I thought my son would never eat. Or when I got a note home from school to say they were tasting traditional Scottish foods the next day and I rustled up dairy free tablet.

Tonight I made gluten, dairy, egg and nut free ice cream waffle cones for the first time fully expecting a disaster and they were incredible. Like lets all stop a moment and say wow…… You can buy gluten free cones but I’m yet to find a brand free of all the top allergens and the majority of recipes I looked up contained egg. After some time googling I came acrossĀ http://www.forkandbeans.com/Ā and a recipe for gluten free vegan waffle cones and today I bought a waffle cone maker in Aldi for Ā£9.99! The cone maker was a special a couple of weeks ago so I was lucky (and very excited!) to find one.

This is the recipe I followedĀ http://www.forkandbeans.com/2015/05/22/gluten-free-ice-cream-cones/

I did not have the exact ingredients so I substituted a couple. This is what I used

1/3 cup Millet flour (quinoa in original recipe)

1/4 cup Tapioca starch (instead of Arrowroot)

1 tablespoon psyllium husk (I buy Holland & Barratt’s Colon care)

1/2 teaspoon baking powder

1/4 teaspoon salt

1/4 cup caster sugar

1/3 cup + 1 tablespoon rice milk (could use df milk of choice)

2 tablespoons sunflower oil (instead of avocado oil)

1/2 teaspoon vanilla extract

1/4 cup dairy free chocolate melted (I used Plamil dairy free dark chocolate drops microwaved for 1 minute, stirred and microwaved for a further 20 seconds) optional

Measure flours, psyllium husk, baking powder and salt and sift into a large bowl. Whisk to combine.

Mix dairy free milk and sugar together then stir in oil and vanilla extract.

Combine with the flour mix and stir until smooth. The mix looks thin but hang on a minute! It thickens on standing! I realised this after I made my first one…


I added an extra tablespoon of flour without realising leaving it for a couple of minutes would do the trick!

The waffle iron I used is hot when the green light is on. I greased the waffle plates with sunflower oil and wiped it with kitchen roll.

Place 1 tablespoon of the mix in the centre of the cone maker and close and cook for 3 minutes. The next bit will take some practice and co ordination to master but with my husband working as my glamorous assistant I removed the waffle using a plastic slice and he rolled it around the plastic cone.


The waffles stuck to the top plate and I had to work quickly to remove them before they hardened. My husband commented on how forceful I was but the waffles are quite hardy before they set. Depending on how asbestos your fingers are you can wrap and press together with your fingers or use a clean kitchen towel to hold the cone in place. It hardens really quickly!! It took us maybe 3 goes before we mastered a usable cone! The scraps tasted fab though so we persevered!

We dipped the set cones in melted dairy free chocolate and would have allowed them to cool and set if we had had any patience and it hadn’t been 8pm. I dropped a mini marshmallow into the cone to block the small hole at the bottom and served it with a small spoonful of dairy free ice cream.


The joy in making my boy something I can’t readily buy for him is worth all the mess and the dishes and slightly cooked fingertips. He loved his cone but was fairly matter of fact about me making them. This is his Mummy after all who made dairy free creme eggs at Easter and an Angry birds birthday cake without wheat egg or milk. It’s really (feel free to replace really with an appropriate swear word) hard being an allergy mum but tonight I am a superstar.

P.s you can mould the just cooked waffle into a small bowl/muffin tin to make an ice cream bowl.